Pages

Showing posts with label Knitting. Show all posts

Thursday, June 11, 2026

Make Legs for Your Sweaters

LEG PATTERN ONLY - This is not a sweater pattern, nor does it reference any sweater or pattern in particular. It really doesn't matter what cardigan pattern you use, just general instructions on how to add legs onto a sweater knitted from the bottom up. If you are knitting from the top down then you would reverse my leg pattern rows to the bottom of your sweater where necessary.

You can take any sweater pattern and turn it into a jumpsuit for your doll. The instructions are a little different if it's a cardigan than if it's a pullover. A pullover will need an opening in the back of the sweater to be able to easily put it on the doll. 

This is my pattern for generic legs for a one piece jumpsuit on any sweater but you can adjust it to fit a larger or smaller doll sweater pattern. Additionally, you don't have to do a rib stitch on the cuff. You can change it up. Use my instructions to add your own flair to your doll outfits.


To determine the number of stitches you'll need for each leg just divide the total number of stitches of the bottom row of your sweater pattern. So as an example, I'm giving the instructions for two legs on a cardigan sweater with a final stitch count of 61 stitches (bottom of the sweater) to match the top of the jumpsuit but it can be applied to any sweater pattern, any size, any number of stitches. So here are instructions for the legs.

LEG PATTERN for jump suit.
Working from the bottom up, cast on 30 stitches for the left leg bottom (or half of the number of stitches of the sweater bottom).

Row 1-2: K1, P1 across for 2 rows. (rib stitch)
Row 3-10: Knit odd rows, Purl even rows for 8 rows for long pant legs (stockinette stitch)
Row 11: Kfb on first and last stitch, Knit all stitches between them. (32)
Row 12: Purl row (32)
Row 13-18: repeat rows 11 & 12 x3 (38)
Row 19: Cast off first 4 stitches knit wise, K33 (34)
Row 20: Cast off first 4 stitches purl wise, P29 (30)
Row 21: Knit row (30)
Row 22: Purl row then cut the yarn leaving a short tail for weaving in

Leave work on needle and cast on 30 stitches for right leg on the same needle. Repeat rows 1-22 for the second pant leg except on row 20 cast off only 3 stitches to make a final stitch count of 31 stitches on second pant leg and a total of 61 stitches across both pant legs. Do not cut the yarn.

Work across both pieces as one, knitting across both pant legs.

Row 23-26: K odd rows, P even rows in stockinette stitch for 4 rows. Leave all stitches on the needle. And those are the legs.

************

Add them to any sweater pattern working from the bottom up.

Work the right front piece of your cardigan starting at the bottom of your pattern, skipping over any decorative edge of your pattern. When complete, fasten off yarn and move those stitches to a stitch holder.

Re-attach yarn to right front side and work four rows of the back in stockinette stitch. (To make the tail hole) Work over half of the back piece stitches for 5 rows ending in a Knit row. Cut yarn and move those stitches to a stitch holder. Reattach yarn on right side and work 6 rows of the other back half in stockinette stitch ending in a Purl row. Don't cut yarn. Slip first half of back piece onto the right needle turn and purl across the back of those stitches. If your doll does not have a tail, just work across all your back stitches at once instead of dividing them. Finish the back section (minus the first 6 rows in your pattern you just worked) and fasten off. Move the completed back stitches to a stitch holder.

Attach yarn to the right side remaining stitches and work your pattern for the left front side of the cardigan skipping over the bottom edge rows, working as many rows as the right side. Complete the left front side but don't bind off. Cut yarn leaving stitches on the needle. Move all stitches back onto the left needle and reattach yarn to right side. Add your collar and sleeves using your pattern. Just sew up your one piece coveralls and embellish with embroidery and buttons.

Sew up the arm and leg seams first, then the crotch from back to front. 


Now you can add legs to any sweater pattern that you have for any doll. You can even make your own fashions by changing the collars, sleeves and leg lengths. Shorten the legs, leave the arms off and you have a little summer jumpsuit. ENJOY!


Friday, January 16, 2026

Convert Knitting Patterns from Flat to Round

I love knitting in the round. It saves time and there are no purl stitches unless you want something to stand out on purpose. Best of all, if you hate sewing pieces together, then you will love knitting in the round. You really need to master the basics first. And you need to be able to pick up stitches because that's how you add on instead of sewing pieces together with a ladder stitch. 


When you knit in the round, you can add things on similar to crochet construction only better because knitting looks smoother and the stitches are straight so patterns look better. Once you get the hang of it, you won't go back.


I use 5 needles on the body from the leg tops and 4 needles on everything else. I also use a stitch marker to mark the rounds in places and I re-write the pattern from the bottom up, just reversing the increases and decreases. Also, since there is no seam to sew, I take off 2 stitches from each row when I rewrite the pattern. It comes out the same size as the flat pattern. Anything that calls for knit on the purl side, I just reverse and purl on the knit side to make the same pattern. I also use M1A (make one away) to increase in a project this small because it does not add bulk to the knitting especially in places you want to lie flatter, like the bottom of the feet. Unless I'm making clothes, I almost always use M1A but I do use it too on the other side of arm holes for adding stitches back on.


I've taken a flat pattern and converted it to knitting in the round. Without showing you the pattern, I will show you the highlights of how I did it. I love to make little animal dolls but some of my favorite patterns are all done in flat. So I had to convert them to make them more fun for me to want to make. I started with the bottom of the foot. After finishing each foot and stuffing them, I leave them on the needles until I need them. Instead of casting off, I divide my 14 last row stitches on DPNs for each foot into 7 front stitches on one needle and 7 back stitches on another. So each foot has two DPN needles at the top with seven stitches on each. You'll need DPNs with five needles to make it easier. Easy so far, right? The only thing I knitted flat on this bunny was the ears.


Now I want to add the body but the stitches are greater than the 28 stitches total of the legs. So I need 32 stitches for the bottom of the body. I decide to add the four stitches difference by making two stitches each side between the legs. I knit the front seven stitches of the left leg, add two stitches by M1A (x2), knit across seven front stitches of the right leg.  That gives me 16 stitches across the front. 


Then I knit across the back right leg, add two stitches M1A (x2), knit across the left back leg. Now I have 32 stitches total in the round. Then I just place a stitch marker and knit in the round for as many rows as I need to make the body before I start decreasing toward the neck. The pattern will tell me where it was increased when knitted from the top down and that is where I decrease the same number of stitches from the bottom up (and minus 2 stitches on each row still). 


You can pick up stitches for the arm tops on the animal's body and knit down to the hand in the round or just make them separately in the round (minus 2 stitch count) and sew them on with a few stitches. If my head pattern starts in the back of the head instead of at the neck, I just knit the head in the round taking off 1 stitch from each end in the instructions and just attach it to the body when finished. Or you can just do it flat and seam it if you want. It's up to you.


I pick up 5 stitches at the increase point on the side of the body. Then I work (M1A, k1) 5 times to put 10 stitches on the needle. Then I separate the stitches onto 2 needles every other stitch (5 stitches on each needle) to make 10 stitches evenly spaced when I knit them in the round adding stitches if the pattern calls for it. You could do this with 8 stitches divided into 4 on each needle also if you prefer.


Then I just knit them all and divide on three needles around. 3-3-4. And keep knitting the number of rows in the round. It is easier to knit the arms on in the round before you attach the head. You can still do it but the head gets in the way a little. It's just easier before adding the head.


I stuff the arm lightly leaving room at the top so the arm will fold down the body and finish the hand off. Using these guidelines you can convert just about any pattern from flat to knitting in the round. If you love knitting in the round, you won't want to go back to knitting flat and seaming all the pieces together again!


As far as I'm concerned, there are no disadvantages to knitting in the round. You don't need to block the animal bodies and textured sweaters anyway and that is where you will save a lot of time. You can shape the head in the round just as easily IMO. Just stuff it full and shape it before you close the nose end. If you need to manipulate it further you can insert a crochet hook and pull the stuffing into place on the inside.


Testing the fit of the parka on my bunny knitted in the round before he got his nose and ears. It fits! But doesn't he look cute with a face and ears!


You will love knitting in the round. It will save you all kinds of time better spent knitting rather than having to sew it all together later! I would rather be knitting than sewing. 


All of the LCR patterns use a similar boy feet and body pattern and similar girl feet and body patterns so once you convert these two body patterns to knitting in the round, you can make all the LCR patterns from them. You don't have to convert them all!


What I like to do is buy either the boy or girl pattern of one animal (depending on if I like the dresses or sweaters better) and just use my other boy/girl feet and body patterns to make both. Really only the heads and sometimes hands will be changeable for different animals. I also sometimes use Mary Jane's Tearoom small bear pattern in the round for the feet and legs because I like the way the shoes look when it's all knitted together. But after converting a boy pattern to knitting in the round, I can make girl shoes and removeable unders to make a girl any time I want with just this one pattern. ENJOY!


Wednesday, August 20, 2025

Franken-squirrel & Other Pattern Hacks

I've been pretty obsessed lately with knitting. I know... it's hot. But I have A/C so it's not unbearable sitting at my desk and knitting. I have one of each of the animal patterns that Julie Williams has come out with for knitting these cute little creatures. I usually either buy the boy or the girl but sometimes I get both if I want to make the sweaters and the dresses. This is my third lamb/ram. But right now I'm obsessed with squirrels!


I once knitted and crocheted for two and a half years (in my spare time) without taking a break, one project after another and I was fine with that so I love to knit and crochet. I love to make things and I have to have an outlet from reality. I just can't wait to make the next newest animal pattern and about a week ago I learned there was another new pattern being published by Julie so I got busy making a franken-squirrel since I couldn't get the pattern yet.


The legs, bodies and arms for her boy and girl patterns are all basically the same so I used a leg, arm and body pattern from the boy bear. The body had a white belly, not hard for a seasoned knitter to figure out from the picture by counting stitches but the head was going to be different.


I used the bear head pattern and modified it for the last five rows making the muzzle white and then I just embroidered over the nose part. But I've since discovered that the dog pattern would have given me the exact muzzle I needed from the Doberman instructions and making the last five rows white on the muzzle. The nose and muzzle would have been perfect for the squirrel. Then the pattern became available so I got it.


I used the ears from the fox pattern for my frankensquirrel but I could have made them a little smaller. Then I just added little tufts of yarn to the ends which I will separate and comb out with a wire brush. Positioning them and sewing them on in the right spot makes them look more squirrely. For the eyes, I didn't knit in the white patches, instead I used white felt on my plastic eyes and cut out the circles around them.


I used a capped sleeve pattern from the seasonal dresses instructions and just roughly drew out the acorn and oak leaf pattern to do my color work.


I also wanted my squirrels to wear some Ugg type boots. I got the pattern from Crafty Braam and modified it for making the boy boots a little taller. My yarn for those was a little thicker so the boots turned out perfectly big for his big feet.


I bought the boy pattern because I wanted to make those gorgeous sweaters! I also decided to give my girl squirrel some boots too. I wanted to make her some pink ones but my first try looked like house slippers so I started over. Maybe a different shade of pink would work better. 


I also found a backpack pattern from Mary Jane's Tearoom that I really like and I wanted to fill it with acorns so I found a bunch of free patterns for acorns too. I also found some free knitted oak leaves. I really had fun with these.


Saturday, July 8, 2023

Little Ponies

Well another pattern has dropped from Julie Williams of Little Cotton Rabbits and it's horses... and ponies... and unicorns... and donkeys! All from one pattern. Actually the pattern has been out for a little while, I just now got to it.


I can honestly say that I have one of each animal pattern that she makes. Either a boy or a girl because if you have one of each pattern, you can make both using the generic bodies and just changing the heads.


So I pick whether I want to make the dress or the sweater... it's just that easy for me. But I had a tough decision on this one because I fell in love with the dress pattern and the boy sweater pattern that looks like bubbles.


She turned out so cute. Now I want to make the boy horse... or a donkey. I love them all. What I love about her patterns is that you can make a lot of different dolls all from one pattern just by switching up a piece or two. 


I've got quite a collection of these little cuties now. Some day I will get them all out and take pictures. You would be surprised at how many of these dolls you can accumulate in just a few months... or years!


I'm working on a pattern now that I picked because I fell in love with the sweater. It's a chipmunk! I can't help it. I'm hooked on making these babies!


Tuesday, February 14, 2023

Little Cotton Rabbits - Mole

This is the latest pattern from Julie Williams of Little Cotton Rabbits. It is a Mole and I chose to make the little girl, which looks just like the little boy... only in girl clothes.


I used other clothes patterns that I had for this one. I kept thinking that it needs some hair or ears but moles don't have that. 


So maybe I will add a little flowery hat later on just so she looks like a girl. I decided to make the shoes as slip ons and not with a strap and I could have embroidered little flowers on her coat or gave her some pockets but this was all that I did for this one.


I was less enthusiastic for some reason on this one. Maybe I was just ready to move on to something else. I do look forward to all of Julie's new patterns coming out and I can honestly say that I have every animal pattern she has, either a boy or a girl and I just mix and match the instructions and clothing for them.


Julie's patterns are so versatile, you can make literally any breed of dog from her instructions and modifications on her doggie pattern. Same with her other patterns. I love all the options that she gives you for personalizing them to make them your own.


No two ever need to look alike and that's really the beauty of a good pattern. 


Thursday, September 22, 2022

Bears and More Cute Bears

I went through a painting phase this summer and I think I got it out of my system... for now. But you know, when I feel like painting - I have to paint. And when I feel like making bears, I have to make bears.


I ran across these patterns by Mary Jane's Tearoom sometime in the last two years and although I wanted to try them then, at the time I was deep into making Little Cotton Rabbits patterns by Julie Williams. I still enjoy making them especially when she comes out with a new animal pattern. But lately I got the urge to try them. So I made a small 8 inch bear first and it took about three days. That's about what I spend in time on most other little knit animals. But that 11" "Candy Bear... it took me 6 days. I just can't spend that much time on one make. It's too much time on those baggy pants.


I knew knitted toys take a little longer to make than crochet but these little baggy pants are on another level. They absolutely take longer to make. I spent as much time on just the pants as I did the animal and I did not enjoy it. So although I really think they look great - and a little like they are styled from the 80's... I probably won't be making very many more of them. They are pretty but take up too much time. In contrast to crochet, I can make a similar sized animal with clothing in just 2 days. 


Although I like knitting very much, I need instant gratification when I make a project like a stuffed animal. It needs both to go quick and look stunning to keep my attention.  I'm moving on to Pica Pau next. The animals are more modern than the knitted ones and there is a whole smorgasbord of animals to choose from!


Sunday, March 6, 2022

The Winter Witch

WHEW!!! This is the most involved, detailed doll I think I've ever made. And it took me the longest time to make her but in all fairness, I did work on another doll at the same time. I had to take a break from all this detail. I also tried to stick pretty close to the pattern. I made all the pockets and stuff to go inside them. I also made a few extra rat heads to decorate her hat.


The pattern is tedious. It's knit in small stitches on a number 2 needle to get the right gauge. I got tired of working on that dress. I thought it would never end. So I did not duplicate the skirt to make her a slip. I thought it would make the doll too heavy and I wasn't going to torture myself with it.


I absolutely loved working on those rats heads. It was the highlight of the whole project for me. I also loved working on the hat. That hat was just amazing. I did crochet a circle to cover the inside stuffing which was not included in the pattern but I felt necessary. Although later I did decide to sew it on her head.


The hair was fun also. I used a fiber that resembled the angora called for in the pattern. I could not find angora anywhere locally. What I used was Joann's Buttercream Luxe Craft Angelhair in white. Then I added a navy eyelash fiber to it to make color streaks in the hair.


I did not like the scarf shown in the picture so I cut a knitted scarf out of some sequined sweater material that would not unravel.  And I sewed on a little cape to it. I love the sparkly stuff. I also used a strip of it as her hat band.


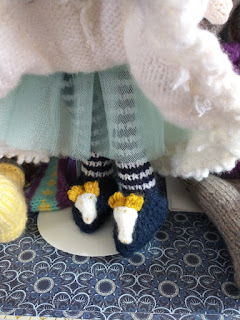
I opted to make her a tulle slip with a ribbon tie but after I got all the stuff sewn onto the bottom edge of the skirt I realized that it really doesn't need a slip at all. The edge has the volume to expand the dress skirt without one. The shoes are a little big so I might have to sew them on. I had to stuff the toe with cotton. I just smile every time I see those little rats heads!   


I loved making this but I probably won't make another one at least for a while, if ever. Too much detail for me and those flowers are a killer work up on needles! I don't know how you would make them without getting the stitches too tight, It's a lot of increases in such a short number of rows, even though they do look pretty when done.


Wednesday, February 2, 2022

Matthew the Bunny

I decided to take a break from my little amigurumi dogs and cats when I saw this bunny. I just love his feet and knew I had to make him. 


He is mostly done on straight needles but his ears and arms are done on DPNs (double pointed needles). I used Premier yarn in 'greige tweed' I got at the Dollar Tree months ago. I really like this yarn for animal dolls.


He's also a little bigger than I like to work but he is worth it. He's 12 - 1/2" tall. I like him at this size because you can see the detail in his vest better. I shortened his shorts so you could see his legs and next time I will make a different waist on the pants, probably a rib knit for a few rows. I don't like the fold down waistband.


I am in love with his little vest. I had to make my own buttons from polymer clay. I couldn't find any that I liked in the stores. In fact, I love all the sweater patterns. You can get them from Alexprettytoys on etsy. I hadn't done much with cable pattern stitches on a purl background before so it was a learning curve for me. The sweater patterns are not simple looking but once you make one they get easier to knit. It's wonderful to see the pattern coming together while you knit.


I just happened to have some mustard colored 50% merino wool yarn that I wanted to use for his vest. I love it! I will probably make more of these bunnies because I love the stocking feet! He has a cute pom pom tail too. There is a bunny photo shoot on my blog  DustBunnyGazette.


And of course he needs a blanket, a scarf, a girlfriend and a picnic basket. More to come...