Pages

Showing posts with label Paper Crafts. Show all posts

Thursday, December 18, 2025

OH! Happy Christmas!

So in the crafting world this is the time of year to wind up your merry making and try to enjoy the rest of the season. I did find some resources for last minute making and one I wanted to share was the discovery of a site that's been around for a while. It's called SVGCUTS.COM . If you love to paper craft and you have a cutting machine like a Cricut, this is your paper project making heaven.


You could probably still get a small project or two done before Christmas if you wanted like the rocking horse box, which can also be made into an ornament for your tree in any size. Or made into some last minute Christmas cards.


Mary has been making pop-up cards since the early two thousand years and added these around 2014. And she keeps adding more. That's a long time to be in the crafting business so you know she is successful and very creative. I think one of her most popular designs is her Heirloom Christmas tree pattern.


I wanted to make a small tree this year and I ran across this one. Since I couldn't think of a way to make a better one, I bought the pattern. I just love my little tree! But there are so many patterns on her site. Cards, boxes, decorative houses and more. And her Summer themed card projects are stunning.


It's not hard to see how someone could get a lot of great ideas from Mary's site! These were added around 2014, maybe a little before that date. I'm going by the last review posted.


And such cute little projects from purses to gift bags.


I cannot say enough about this site because it just blows me away with all the projects and creativity. It might be enough to get me to dust off my Cricut and get busy. These prices aren't bad if you are looking for an alternative to a previous hobby that might have gotten too expensive for you this past year. One cut file can go a long way. I think it's much more economical than metal dies. And if you want that embossing texture, you can always run a piece through an embossing folder after cutting it out. 


I just had so much fun making my Heirloom Christmas tree project that I want to share my thoughts on it and maybe steer you toward a more affordable hobby for next year, especially if you've got an unused, dusty Cricut sitting in the corner like I do. Valentine's Day is coming next! But at any rate, happy crafting to all my friends!


Thursday, September 4, 2025

I Love Book Nooks

It's no secret that I love miniatures and miniature houses. I've built several dollhouses and miniatures from scratch. So I just love to put things together. My son bought me a lighted DIY book nook kit for my birthday this summer and it took me all of three days to put it together. I had a few leftover books from it but I used everything else to make it.


It comes with a tube of glue similar to E6000 but I didn't use it for most things. I used a simple white glue that dries clear and spread it with the end of a toothpick for the little tight places.


It's a Beyond Library Book Nook, part Night at the Museum and part Sherlock Holmes but I like it. I don't care how you slice it, it's just cool to look at. It's got a fancy touch light but you can get lights cheaper and easier to place for other projects.


I'm so proud of the way it came together. And I love those dinosaur bones. They were tricky to punch out without breaking but they give you an extra one in the kit just in case you do. I have an extra set of dinosaur bones now.


I really love the wooden laser cut DIY miniature greenhouses and the book nooks but they are a little beyond my budget these days so I wanted to make a book nook from scratch and see how that goes. I figured out the dimensions at about 5-1/2" x 3-1/2" would be a good size to start with and I could make it about 9" tall. So starting with those dimensions, I got busy.


This is my rough sketch. It has to be part book nook, part diorama and part conservatory but I'm going to enclose mine with thin clear acetate sheets to keep the dust out. And I want a little door or pack in the back for holding my light battery pack. I have several ideas with the holidays coming up.

I also want a front that opens in case I want to fix, add or change something inside the box. It can be cut out with poster board or heavy card stock. And you can always double up your paper or add an extra layer to an inside wall to make it more sturdy.

And I want windows in the top but it has to be solid enough to hold lights or a paper or beaded wire chandelier. I may not get all those things incorporated when I'm done but it's a starting plan. If all goes well, I should have a prototype soon and a working model not long after that. And then I'll post a pattern to Thistles and Twiggs so you can download and make one for free. 


Thursday, January 16, 2025

Valentine Love Soldiers

I was pretty busy with the nutcrackers I made for Christmas and I liked them so much that I carried them over to Valentine's Day.


They have such funny faces that I just wanted to keep making them.


I made four for Christmas and I could have made more but I wouldn't have known what to do with them if I did.


Now that Christmas is over I have Valentine's day on the brain. I've been making little decorations and just thought they would look darling as soldiers for love.


I've never seen nutcrackers done up for valentines' day that I can remember. I got to drag out my heart bling and my red and pink sparkles for these.


I've been working on a few other little projects but not too much to brag about so far. I've also been doing a lot of reorganizing and cleaning out my stash of die cuts. I've had a lot of creative blocks so far so maybe it's time to just rest or do some old fashioned house cleaning.


But I'm still looking forward to Valentine's Day!


Friday, November 22, 2024

Christmas Nutcrackers 2024

Everywhere I go this year I'm seeing nutcrackers. I don't think I have even one of them in my Christmas decorations. I'm not a collector of these things but this year I'm going to make a few. So that's this year's theme. I like to DIY my decorations whenever I can.


So I guess these things have been popular this year because they keep popping up on my pages. People actually have a group for collecting these seven foot tall plastic ones that they paint and post online. I don't have anywhere to store anything that huge so I'm not interested in those.


But I do see a lot of DIY ones on YouTube. Bargain Bethany has a huge nutcracker she makes out of Dollar Tree laundry baskets for about twenty dollars in materials. Go watch that here, it's amazing.


I'd like to make one but I don't want to tear them down or store them anywhere so I ran across a tutorial to make smaller ones. And they are so cute. They are made of all Dollar Tree finds! Araceli Chan has a great small nutcracker DIY that you can use to make your own little decorations. 


And that's the one that I used. I think I added a little more bling to mine though. I also drew and painted a face for mine while adding a few personal touches. I didn't want mine to look scary.


I love the way they turned out and they are the perfect size. I can easily store these without breaking them. Overall it cost me about five dollars to make one. I already had all the bling and glue in my stash. I recycled the base of the doll from a screw on plastic lid and I already had the white and gold spray paint for them.


All I had to buy was the plastic pieces from the plasticware section of DT. I used six different packages to make two nutcrackers. I used the shot glasses, mini round glasses, clear plastic tumblers, cordial glasses, wine glasses and medium round clear ornaments or any smooth plastic ornament 3-1/2" in diameter would also work.


You need a glue gun, tacky glue and a soldering iron for melting the pointy crown out of a tumbler if you're going to make that one. You also need some zip ties and some fuzzy yarn, acrylic paint, a feather duster or refill pack, ribbon and a lot of bling. And you might need two packages of the cordial glasses if you are going to make two nutcrackers. One package is only enough for one set of arms and legs.


Basically I just threw the decorating kitchen sink at these and made them with whatever I already had like metal ribbon and various assorted metallic bling strings. You can make the hands out of wooden balls or glue stick lids or just paint the bottom fourth of the shot glasses with flesh colored paint. Just use whatever you have and do whatever you think looks best.


I loved the way mine turned out. Even after spraying all the pieces with white, I had to give them two and three coats of acrylic paint. These would make pretty table centerpieces with greenery around the bottom or a nice decoration to include in a gift basket with some fruit and nuts! 


Sunday, November 3, 2024

Create 10 Projects (Spoiler Alert)

IT'S ALL ABOUT RIBBON THIS YEAR!

It's almost here! You don't get any 12" x 12" paper, you don't get any bows and you don't get very many extras but you do get a lot of ribbon. You do get some heavy plain card stock. And I think Anna is going to show us how to make bows again this year. 

So I usually get my materials for the classes 2 to 3 weeks ahead to cut out the stuff we will need to make projects for each class. And I usually get all that done and I put a lot of stuff together. Basically I'm in craft heaven for a month or more, then I just make a few more things here and there afterward.


Class 1: The first class was for me the show stopper. I didn't think I would like those eyelet frame looking cards but after I made a few, I fell in love with them. I just didn't like the examples that were shown. But I found other uses for them too. I like cards and card dies and I really like the way the ribbon looks on the eyelet frames..


So I also come up with my own designs occasionally and those little ornament shoes in class 9 reminded me of a pattern I already had. I had made a larger shoe pretty much like them from a free pattern I got online. I decorated it with the eyelet frame dies. You can use these eyelet frame dies and cut them into pieces for other designs. I really like them.


Class 2: I love decorative tags but I don't much care for them when they are too big. These are too big. I would not use them on gifts because they will just get thrown away. They are cute but they are just too big to use like that. I would however use them as decorations on a large tree or as a garland to decorate a window or door.


Class 3: The Creative Calendar. First let me say that I don't care to stamp and emboss anymore. I would have to be really, really bored to drag out all my stamping materials and work with it. I also don't journal and use printed calendars any more. I have a digital calendar I like and I have a little perpetual block calendar I like. But I love easels. And this one has a beautiful butterfly easel. I made five of them already!


Class 4: The Stylish Hat: Don't know what I'll do with these but they are pretty. Can't see me mailing them or who to gift them to??? But they remind me of the cloth pincushions we made a dozen years ago. You can get pretty creative with these if you want. They bring out the designer in you. So I made two of them but what I really liked was the hat box. Not so much the one that came with (I made two of those) but I wanted to make a round hat box that would hold a hat with a LOT of decorations on them. So I did.


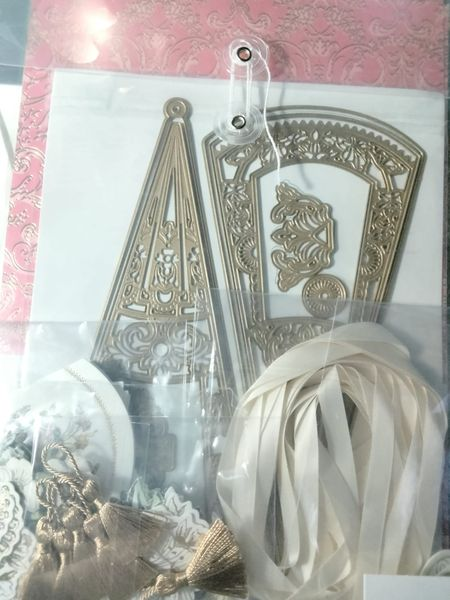
Class 5: French Fan Dies. This was just a beautiful die set. I enjoyed decorating with the pieces and threading the ribbon through the panels. I will probably display one in a butterfly easel in my craft cabinet. They are a little flimsy to be useful but they are so pretty for display. I would not decorate the backs since they won't be seen anyway. Very pretty and easy to make.


Class 6: Treat Box Dies. Another favorite class! These are so fun to put together and decorate. I loved making them. I had the recessed frame inset figured out way beforehand. I have seen these before from other designers and I actually have a pattern for a similar box. There's nothing new under the crafty sun, just another way to decorate it! Love them!! And since we're cutting things that aren't seen in the preview shots, it seems that Anna will demonstrate how to make a ribbon and bow decoration from the large die out of ice blue foil paper. 


Class 7: Theatrical Greetings Dies. Gimmicky, overdecorated, uses too much paper. That's just my opinion. The only use I can think for these is that they would be great for a wedding card... maybe. I will try to think of another use for them later. They do remind me of the stereoscope cards and holder on Pixie Hill by Nicola Battilana. And they remind me also of the old ViewMaster toys. It's the 3D effect.


Class 8: Corset Album Dies. Oh Wow... that's all I can say about a corset photo album. Maybe as a bridal gift with getting ready with the girls pictures but anything else? I wouldn't use it as a photo album. So because it's a garment all I could think of for a good use was a sewing box. So that's what I made with my dies this class. I don't know what I'll do with the album dies if anything. It's very feminine and I like it as a sewing notions box even though I wouldn't use it as a photo album..


Class 9: Origami Ornament Dies. This was one of my favorite die sets. I loved the shoe so I had fun with that. I also have patterns of them in different sizes that I've worked with before. And I already have an angel die so another one was O.K. I did make the frames and I think they are a good idea for people who like to put their kids and grandkid's pictures on the tree. I don't do that any more but I did make two of the frames. I don't like them glued back to back because you can only see one at a time.


All in all I'm pretty happy with the projects. It's hard for me not to like anything creative or making something frilly with paper. I plan to go to every Create event that I can for as long as Anna has them. I look forward to it every year!


And now I can just enjoy watching and participating in the classes without any pressure of stress. I learned from my first Create that you will not be able to keep up and you'll miss out on some stuff if you try. And I can cut out a few more things and make them as slow as I want. Looking forward to it!!!


Thursday, October 24, 2024

It's Almost Create 10 Time!!!

Are you excited? I know I am! I've dragged out my leftover papers from previous years and have organized all my stuff, cleaned off my desk, made a privacy screen for the nightly video chats with other crafters in the craft chat rooms and ~~~


I've watched all the pre cut videos at least once, some of them twice! I've paid special attention to the projects we will be making and I'm confident that I can get at least one of everything done before it all starts. This year my least favorite class has got to be that calendar in spite of it being drop dead gorgeous. I don't like to stamp and the pre-printed is just mostly all done. Add stickers, glue the box together, make a butterfly easel and you're good to go. 


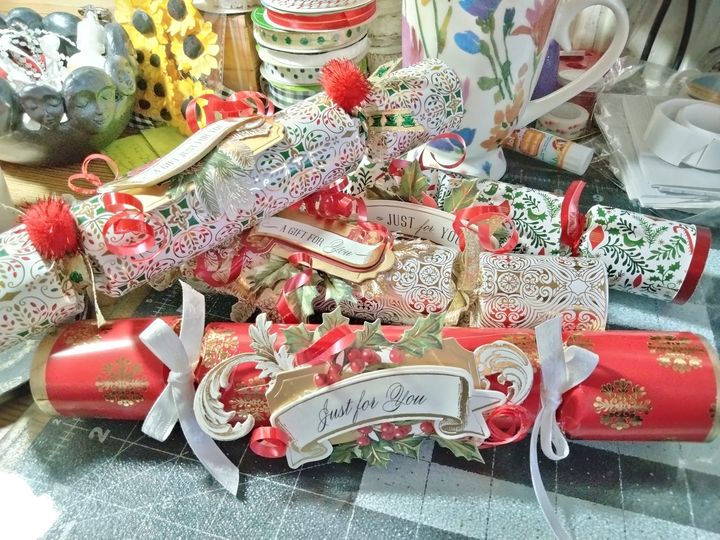
You know me - I look at that big box of goodness like it's a puzzle and I can figure out how to make the projects beforehand. I follow the basic instructions that come with each set of dies and then I look at the preview pictures of all the class projects and figure out how to do it. Last year's least favorite class was the Christmas Crackers. But I really like them, it's just that it seems such of waste of expensive paper to tear them up. 


That goodie box with the diorama inset might be a little tricky but I'm pretty sure I know how to do it. I love Create and I love most everything about it but like every event, you are just not going to like every single class. I have other templates for these type boxes so... these are not new to me. To make an insert or recessed window all you do is cut a hole in the side of your box to fit the background insert and then make a rectangle background for the insert adding an inch around the background paper and make a fold 1/2" in twice. Cut your corners and bend it into a box shape with the outer lip folded back so you can glue the edges to the inside of the box.


Already I think there is a material shortage this year. I have leftover papers from the past two years but this year it looks a little light and NO 12" x 12" paper, plenty of ribbon but no bows but I think Anna is going to show how to make bows from all that ribbon. I also noticed there are not very many printed sheets but plenty of foils. Definitely not as much paper. I wish there were more stickers too. I don't like that shrinkflation has hit my beloved Create boxes but it is O.K. I won't let it ruin my day. Last year's box was packed and overflowing.


I also won't be making a few of the class projects as shown because I just don't think they are pretty. The woven ribbon class to me is a huge waste of good ribbon. I don't think the examples are very pretty so I might do a card or two a little different than shown. The last two years were over the top. It's gonna be hard to beat last year.


I make tags to put on my Christmas tree or use as bunting but I don't give my good paper away to be thrown away as a gift tag. No can do. Gift tags for real? Dollar Tree stickies for cheap and I save my good stuff for the tree. Last year's tags were more substance, more stickers and more layers. I like them more than this year's tags which I felt were a little plain by comparison.


last year's tags


this year's tags


I do not like the corset album as an album BUT, I probably will put the front and back on a little box for sewing notions or add felt pages accordion style as a needle holder for my sewing but I cannot think of any photos I would want to put in a corset album. It's underwear. An underwear album for family pictures? Naaaahhh... I will use it for sewing notions.


My favorites are the hats, fans and ornaments this year. I also like the theater card but, it uses a lot of paper and is pretty thick for a card. I might make mine with a Christmas scene instead of the examples given. I really like the shoe ornaments and wouldn't those hats look good in a miniature version for a fashion Christmas tree?


As with everything, either the price goes up or the materials are less. That's to be expected but I would rather pay more for the quality and more materials than pay less and get less but that's just me. I have a lot of leftovers from the previous two years so I'm good for a while. The Create pouches are a great way to store all that stuff!


After all is said and done, I would still do Create every year that I can and enjoy it immensely regardless of the price and quantity of materials. It's the whole experience of crafting with others and sharing your makes. I think it would be pretty hard to beat last years album. Everything after that would be a let down but... I love this craft. I'm definitely a hardcore Anna Griffin fan. 


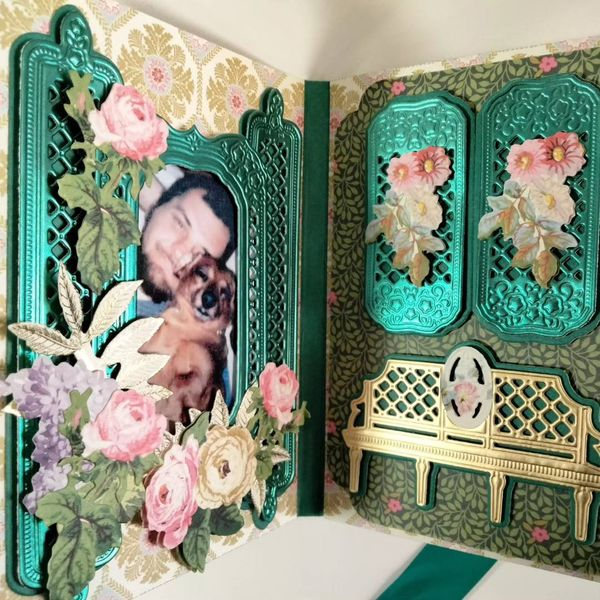
last year's album